Step Seven - Modifying Objects on Forms
Now that we know how to put objects on the form, we will look at how you can modify them in different ways so they give the form a nicer appearance. Things to look at: selecting objects, resizing, moving, changing fonts, changing colors and removing objects.
You probably already know by now how to select an object. You click on it once and small resizing squares will appear on the edges and corner of the object.

After selecting an object, then you can perform what ever action on it. But, what if you want to change a lot of fields at once (i.e. change the fonts of all the fields to Arial) this method would become quite cumbersome.
To select multiple fields at one time, hold the SHIFT key down on the keyboard as you click the fields you want to select. If you select a field that you did not mean to, just click the field one more time while holding the shift key down.
There will be instances where the size of the object will not be big enough. This could be where the product name is longer than the object box or changing the font size to something larger than the box is currently sized for.
To resize an object:

Even the gray workarea can be resized:
There are going to be times where you want to move the objects around to get a better look.
To move a Label Object:
For a Text Object, the process is a little different. If you follow the procedure above, both the Text and Label objects will move at the same time.

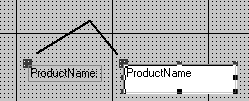
If this is what you are looking for, then great!! But many times, you are looking to move the Text Object a little closer to the Label Object. Let's move the ProductName closer to its Label Object.

Changing the Font and Alignment of an Object
Access comes with a wide variety of fonts, it will be more than likely that you do not want the same boring font for everything.
To change the font of an object, select the object and use one of the options on the toolbar.
Here is a list of some of the different options:
| Item | Description |
| Type of font (Arial, Times New Roman, etc) | |
| Size of the font. | |
| Make the font bolded. | |
| Make the font italicized. | |
| Make the font underlined. | |
| Make the font left aligned so text lines up on the left side of the object. | |
| Make the font center aligned so text is centered within object. | |
| Make the font right aligned so text lines up on the right side of the object. |
Changing the Colour of an Object
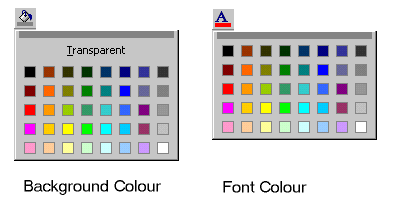
There is a wide assortment of colours to select from for the objects.
The process is similar to that of changing the font.

To delete an object:
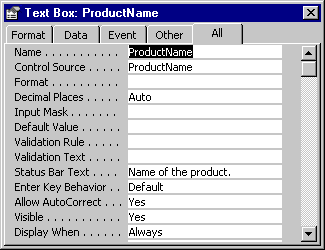
The Properties window lists all the specific details about an object. Items like the name of the object, colours used, font, size, etc. All the things we have been talking about (changing fonts or colours) can all be done through this Properties window, but as you can see, it is much easier just to use options on the toolbar.
To see the Properties for an object:
Here is what the Properties window looks like:

If you want to see the Properties window for another object, just click the object and the Properties window will automatically change (you do not have to click the Properties button again if the Properties window is showing).
To close the form window,
click the ![]() button
or select File, Close from the menu. Click the Yes
button when it asks to save the form.
button
or select File, Close from the menu. Click the Yes
button when it asks to save the form.
This would be a good place to take a break
if you are looking for one. To close Access, click the ![]() button in the upper
right corner or select File, Exit from the menu.
button in the upper
right corner or select File, Exit from the menu.